Fitting Instructions For Venetian Blinds
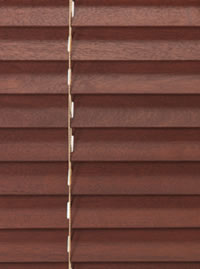
Fitting and Installation of wood venetian blinds
Please refer to our measuring guide for details on getting accurate dimensions for your new blinds. We cannot take responsibility for blinds that do not fit because of incorrect dimensions.
With these instructions you will find sufficient brakets and wood screws for fitting your blind.
Top Fixing Brackets

Fix brackets to the ceiling or lintel with holes drilled on a line at least 3" (75mm) from the wall or window frame for blinds with 5" (127mm) louvres or 2 1/8" (55mm) for blinds with 3 1/2" (89mm) louvres. End brackets should be about 1 1/2" (40mm) from the ends of the track. Any remaining brackets should be spaced evenly between these brackets.
Face Fixing Brackets
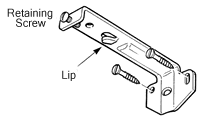
Fix brackets to wall or window frame as closely as possible to the ceiling or lintel with same spacing as recommended for top fixing brackets.
If your blind has a pelmet refers to the pelmet fitting instructions before proceeding.
Fitting the Track
Track must be fitted into brackets keeping controls to side ordered. Locate the small lip projecting from brackets into groove in track. Push track up into brackets. Spring clip brackets will hold your track without further adjustment. If your brackets have retaining screws these should be screwed into the other slot in the track. (Do not over tightnen the screws. This is unnecessary and will damage track).
Remove packing material from track releasing the cord and chain. (Cord control traverses louvres and chain control rotates them.)
How To Install
1.Select the method of mounting that best suits your purpose (see illustrations A, B, C)
A. Inside mounting to the inside or between the sides of window frame.
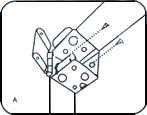
B. Outside mounting to the face or outside of window frame.
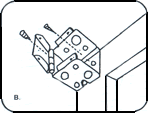
C. Ceiling mounting to an overhead surface such as the top inside of window frame or the ceiling.
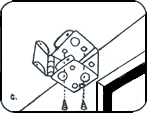
2. Measure where you want the blind to hang. Make sure that the blind is centered and level. When it is positioned properly, make a small pencil mark at each side of the blind to show where you attach the mounting brackets.
3. Hold one bracket (the large hole faces the floor) at desired height and width you have chosen and mark the screw holes with a pencil. Then insert and tighten screw through bracket slot.
4. After the first bracket is mounted, carefully position and attach the second bracket. Double check to be sure that it is level with the first bracket and that the brackets are the proper distance apart.
5. Pick up the blind and slide the headrail into the brackets. Make sure that the blind cord and the roto tilting collar face toward you. Close the front cap on each bracket (see illustration D.)
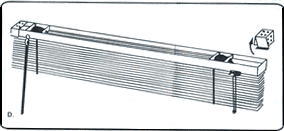
25mm Timber Blind Instllation Instructions

To Operate Blinds
Lowering: Hold core at eye level and move to left pulling down gently until cord lock releases. Allow cord to slip through fingers until blind reaches desired level. Move pullcord to the right and release; blind will lock automatically.
Raising: Pull cord downward until blind reaches desired height, release cord, the blind locks automatically.
Tilting: Rotate "ROTA-WAND" on left side of blind to attain desired slat positions.
Important: Always tilt blind horizontally before raising or lowering the blinf, this increases the life of the blind.
To Install Valence
After your blind has been installed, attache the matching wood valence by its metal clips or velcro which attach to the headrail.
Accessories Enclosed
2 Mounting brackets placed at both ends of headrail
1 Attachable valance
All screws packed in poly bag


